
As an Amazon Associate I earn from qualifying purchases.
Plan an undermount sink and its countertop fixtures together. The faucet, soap dispenser and separate drinking-water tap each need usable space above the counter and room for their mounting parts underneath. A sink fitting inside the cabinet does not establish where those holes should go.
For a KRAUS KHU100-32 installation, treat the sink template as the sink-opening reference. Use the selected faucet and accessory instructions for their separate openings. Have the fabricator confirm the combined layout before cutting; there is no universal hole-spacing number in this guide.
Start with the fixtures you will actually install
Make a short list: main faucet, soap dispenser, filtered-water tap, and any other fitting specified for the installation. Record the full model numbers. A picture of a similar faucet is not enough to establish the handle movement, mounting footprint or underside hardware.
Keep three questions separate: how many openings the fixtures need, how far apart their working parts must sit, and where the countertop can accept those openings. A decorative base plate may cover existing holes, but that alone does not show that a different faucet will fit underneath. For a retained countertop, photograph and measure the existing layout before selecting a replacement.
Check the top and the underside at the same time
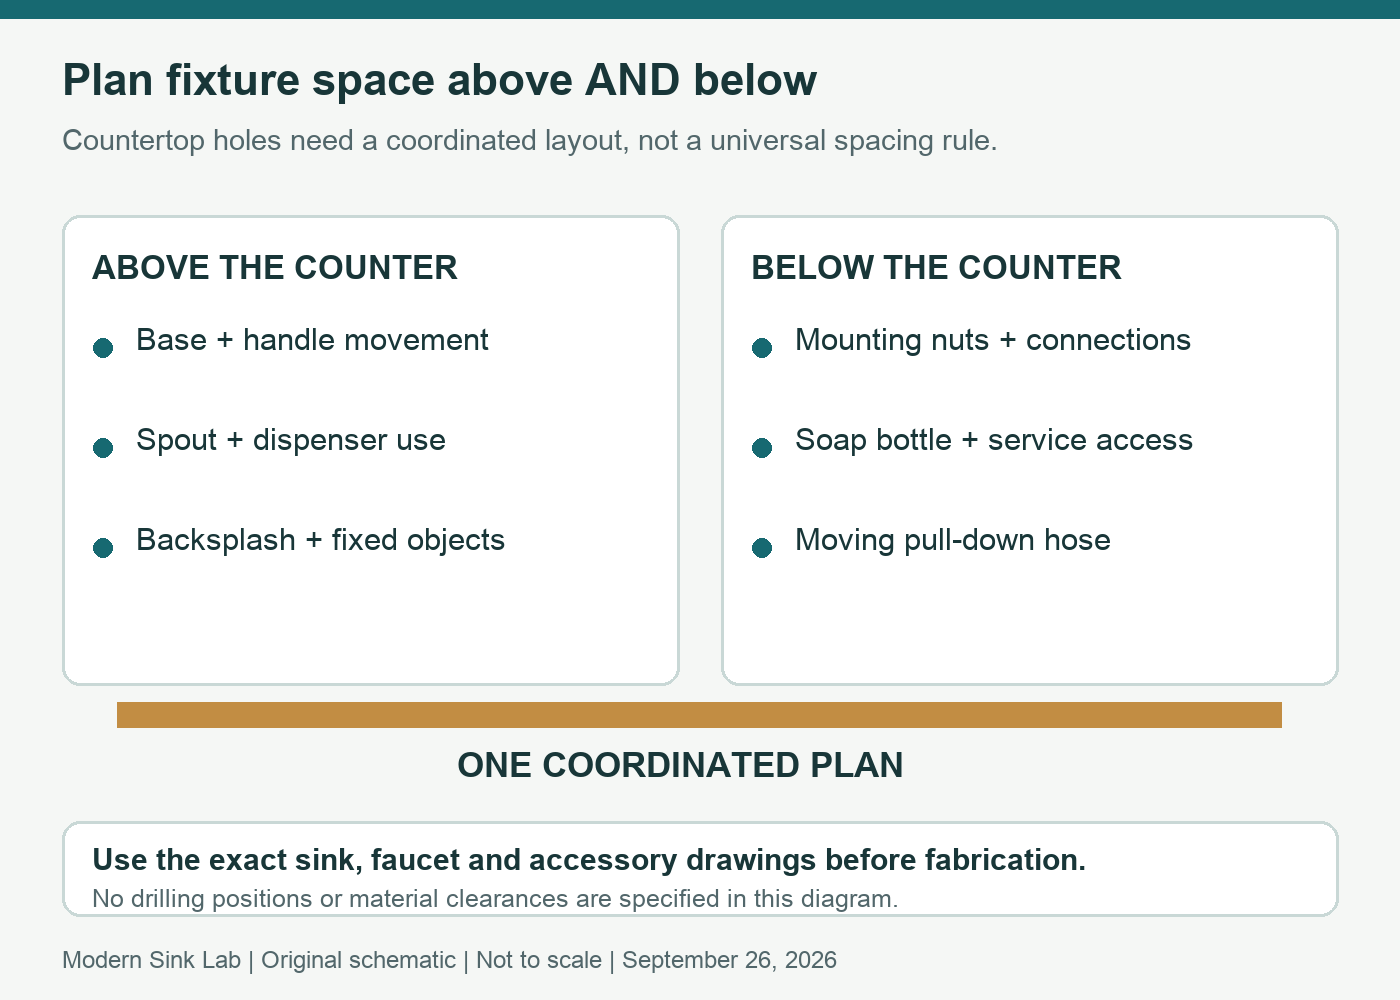
Our planning diagram uses envelopes rather than suggested drilling points. It deliberately gives no universal distances: its purpose is to expose conflicts while they are still inexpensive to solve.
- Above the counter: consider the faucet base, the full handle movement, the spout path and whether someone can operate a soap pump comfortably. Include the backsplash, window trim and anything else behind the fixtures.
- At the countertop: confirm the allowed mounting thickness and the fabricator’s requirements for the material, sink opening and nearby holes.
- Below the counter: leave room for mounting nuts, supply connections, a dispenser bottle and the moving hose of a pull-down faucet. Include access for a person or tool to service them later.
A layout can look neatly spaced from above yet put the soap bottle where the faucet hose needs to move. Moving the bottle after drilling may be much harder than shifting its proposed location on paper.
A real sink example: KHU100-32
The KHU100-32 specification lists a 32 × 19-inch exterior and a 36 × 24-inch minimum cabinet. Those are useful screening dimensions, not a guarantee of fixture clearance. Its installation manual also calls for checking backsplash, faucet and plumbing space when positioning the actual sink and template.
This makes the KHU100-32 a candidate for someone who wants a conventional single-bowl undermount installation and can coordinate the countertop work. It is a poor choice to order as a presumed direct replacement when the existing opening, support or rear fixture strip has not been checked.
For a workstation alternative, account for the accessories as well as the bowl. A board or rack should have its intended working path without a poorly placed dispenser interfering. Use the exact workstation’s documents; do not transfer the KHU template or reveal choices to it.
Use faucet specifications selectively
The KPF-1610/FF-100 combination specification dated December 2, 2021 lists a 1½-inch maximum deck thickness, while the standalone KPF-1610 specification dated June 27, 2024 lists 3⅜ inches. These are different published documents, so the model family name alone is insufficient. Match the ordered package and supplied drawing; if the installation depends on this difference, obtain confirmation for the delivered faucet before cutting. A faucet that suits the sink visually still needs verified deck and mounting clearance.
Ask the installer to review the actual faucet’s mounting instructions alongside the sink and accessory drawings. A forward-moving handle can solve one rear-clearance problem while leaving a different issue, such as a nearby pump or window, unresolved. Assess the complete layout instead of approving it from one favorable specification.
What to give the fabricator
- The sink model, current template and intended reveal, checked against the actual sink.
- The full model number and installation drawing for every countertop fitting.
- A marked top-view proposal showing the backsplash and fixed obstructions.
- An underside proposal showing bottles, mounting hardware, supply connections and hose movement.
- A record of who will confirm the final positions and who will install and service the fittings.
For a new countertop, finish this review before fabrication. For an existing countertop, start with its actual holes and material restrictions; do not assume another hole can safely be added wherever it would be convenient.
Buying decision
Choose the sink after the cabinet, opening and fixture layout agree. The best-looking sink-and-faucet pairing is not the best purchase if it creates an inaccessible connection or an awkward daily reach. If the installer identifies a conflict, compare changing the accessory location, selecting a different fixture or revising the sink plan before committing to fabrication.
Continue with our cabinet and sink measurement guide, under-sink clearance guide and reveal comparison. They answer separate parts of the same fit decision.
Research scope: manufacturer KHU100-32 specifications, KHU installation instructions and KPF-1610 faucet documentation, reviewed September 27, 2026. This is a planning guide, not a drilling template or a hands-on installation report.
Replacing only the soap dispenser? Use our soap dispenser hole-size and deck-thickness worksheet to record the existing opening, clamped layers, bottle service space and dispensing position. Its Moen 3942 and KRAUS KSD-43 comparison shows why a similar-looking pump may need a different hole or mounting allowance.
Allocating a hole for the dishwasher? Check the air-gap hole diameter, deck-thickness limit and two-hose clearance before confirming the final accessory layout.
Once the fixture centers and underside access are feasible, map where the docked faucet outlet will sit over the exposed bowl. Our faucet spout-reach measurement guide separates horizontal reach, outlet height and drain position with a worked top-view example.